You can do copper pipe jointing using different methods like soldering, brazing, compression fittings, flaring, or crimping, but this page covers the flare joint method.
Purpose of this method statement is to establish a standard procedure for the proper use of Flaring Tool.
This method will also serve as guideline for new employee which will be using this tool during corrective as well as preventive maintenance activity.
The scope of this standard maintenance procedure covers all hvac equipment’s which require the use of flaring tool for copper pipe jointing related to refrigeration and air conditioning equipment’s.
Roles & Responsibilities
It is the responsibility of the air conditioning technician to properly use the flaring joint tool and to keep them in a safe place. He should be competent enough to use this equipment to avoid any damage to the copper tubes and to provide the proper hvac results. The maintenance supervisor and the maintenance engineer shall ensure the implementation of this maintenance procedure for the project or the building contract.
Brief Description of Flare Joint
Flare joint is one of the common method for joining copper tubing and fittings. The joint uses a flare on the end of the tubing against an angle on a fitting and is secured with a flare nut behind the flare on the tubing. The flare on the tubing can be made with a screw-type flaring tool.
Procedure for Flare Jointing
Prior to the work, wear safety shoes, gloves and goggles.
Prepare flaring tool, tube cutter, reamer, sand cloth, brush, flare nut and fittings.
Cut the tube to the specified length.
By using the reamer, remove all the burrs and clean all residues from the tubing.
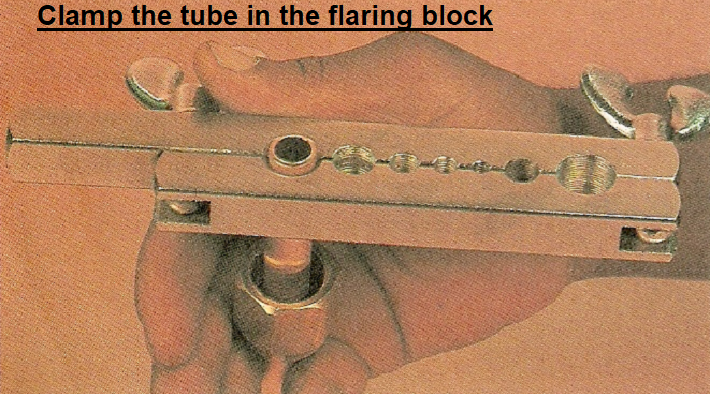
Slip the flare nut or coupling nut over the tubing with the threaded end facing the end of the tubing.
Clamp the tube in the flaring block. Adjust it so that the tube is slightly above the block (about one third of the total height of the flare).
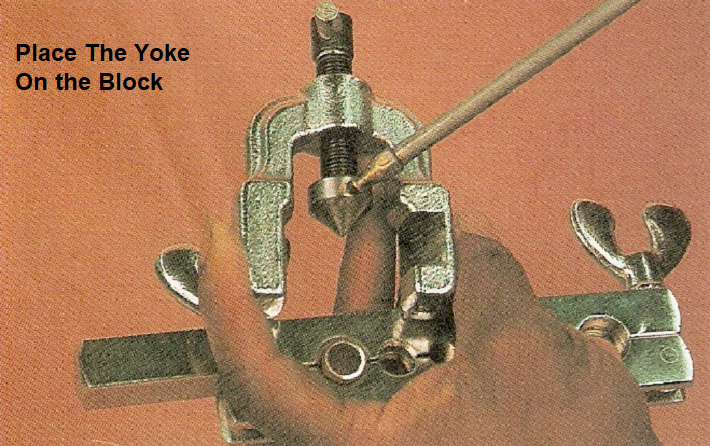
Place the yoke on the block with the tapered cone over the end of the tube. During the process use one or few drops of refrigerant oil to lubricate the inside of the flare.
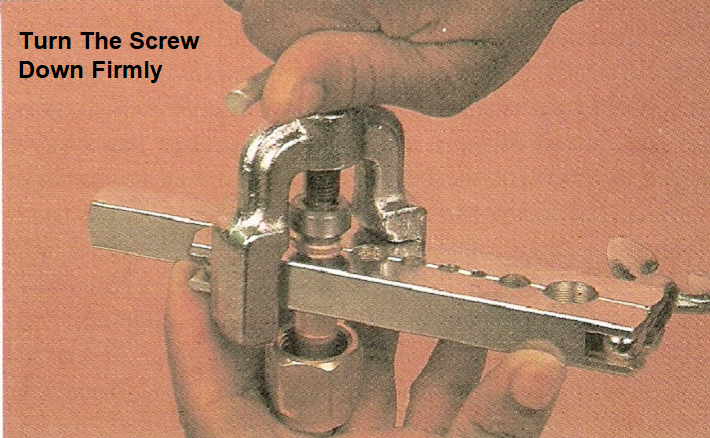
Turn the screw down firmly. Continue to turn the screw until the flare is completed.
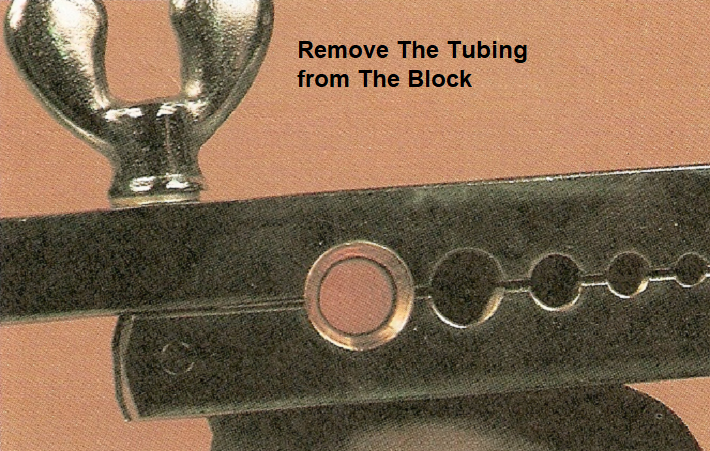
Remove the tubing from the block. Inspect for defects. If you find any defect in the flare cut-off the flare and start over the process.
Assemble the copper piping using the flare joints.
References
Refrigeration and Air-conditioning Technology, 3rd Edition By: William C Whitman & William M. Johnson
TESDA Refrigeration and Air-conditioning Manual