Purpose:
To establish a standard procedure for the proper operation and preventive maintenance of chiller unit.
This will also serve as guideline for new employees and trainees who will be dealing with chiller unit operation and maintenance activity.
Scope:
The scope of this standard covers all chiller related equipment’s which are under air conditioning maintenance contracts and defect liability periods.
Responsibilities:
It is the responsibility of the AC technician to properly operate and maintain chiller equipment’s.
Maintenance staff shall be competent enough to operate and maintain these equipment’s to avoid any rise in temperature in the chilled water system and to avoid equipment breakdown.
The ac supervisor and the site Engineer shall assure the implementation of this maintenance procedure.
Brief Description of Chiller Unit System
Chiller unit is used to cool down water temperature to a specific set-point that would satisfy any requirement for air-conditioning unit in a space.
The basic parts of the chiller unit system are the condenser coils and fins, the evaporator or the cooler, condenser fan motor, expansion valve, semi-hermetic compressor and the control board. Usually, the chiller water is being utilized by FCU’s and AHU’s.
Chilled water is circulated with the use of chilled water pumps.
Chiller Unit Operation Guidelines
Start-up
- Prior to the work, wear safety shoes, gloves and goggles.
- Prepare panel door key, screw driver and multi-meter.
- Prior to start-up, make sure that chilled water pump is running.
- Check the inlet and outlet valve of the chilled water line of the Chiller unit. Valves should be in normally open position.
- Check for any leaks on the refrigerant system. Rectify if found any.
- Check the isolator unit; it should be in CLOSED
- If the isolator has been switched OFF for a long time, wait for 6 hours before starting up the Chiller unit. This would give time for the crankcase heater to function thus extending the life of your compressor.
- Open the control panel door of the Chiller unit using the key.
- Switch ON the Chiller unit by pushing the ON button or moving the toggle switch to ON position.
- Wait for a few minutes before the compressor starts. If the compressor did not start, check for any alarm indication.
- Check condenser fan motors if running. If found any abnormality, switch off the unit and rectify the problem.
- Check parameters on the display board if available. Make sure that all parameters are within acceptable limit.
- Close the control panel board of the Chiller unit.
Properly Shutting down the Chiller Unit
- Prior to the work, wear safety shoes, gloves and goggles.
- Prepare panel door key of the Chiller unit.
- If necessary, in-line stand-by Chiller units to catch the load of the unit to be switch off.
- Open the control panel door.
- Pump down the unit by pushing the OFF button or moving the toggle switch to OFF position.
- Close the control panel door key.
- If the Chiller unit is to be switch OFF for a long time or during maintenance purposes, OPEN the isolator switch by turning the handle clockwise.
Chiller Unit Preventive Maintenance Procedure
Condenser Coil Cleaning (Monthly)
- Prior to the work, wear safety shoes, gloves and goggles.
- Prepare jet pump, screw driver, hose clamp, chemical cleaning agent (if required), flexible hose, extension cord and control panel door key.
- Switch OFF the chiller unit.
- Open the isolator switch.
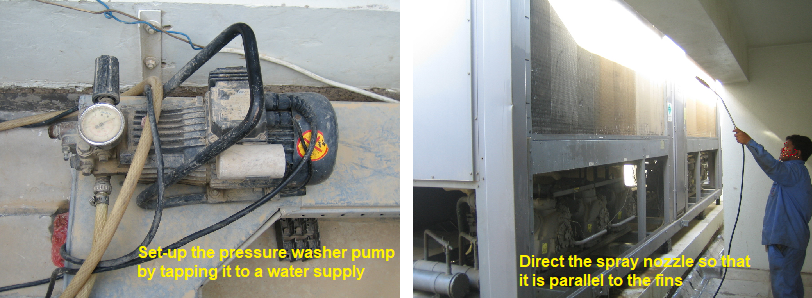
- Set-up the pressure washer by tapping it to a water supply and connecting it to the correct power source.
- Dilute the chemical cleaning agent to a container of water. Apply the diluted solution to the condenser by pouring it along the fins.
- Wait for 10 minutes so that the chemical can be absorbed inside the coil.
- Rinse the coil with water and slowly work the spray up and down the fins.
- Direct the spray nozzle so that it is parallel to the fins. Do not spray at an angle to the fins because they could be bent and may cause damage to the coil.
- Let the water drip and dry all components before starting the unit.
- Start-up the unit and check equipment parameters.
Filter Drier Core Replacement Procedure (Annually)
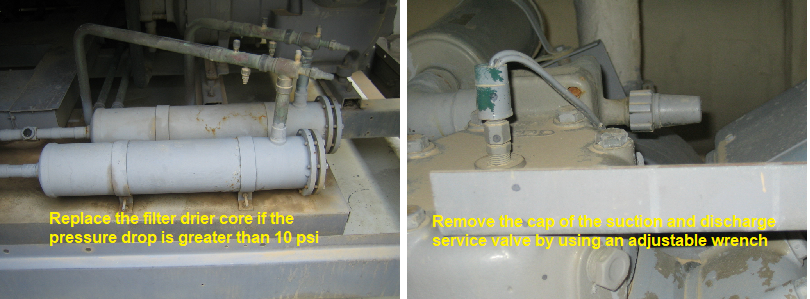
The pressure differential is typically less than 10 psi for a system with clean filter drier core.
Replace the filter drier core if the pressure drop is greater than 10 psi or during the annual preventive maintenance schedule whichever comes first.
- Prior to work, wear safety shoes, gloves and goggles.
- Prepare gauge manifold, filter drier core, spanner, adjustable wrench, open or box wrench, clean rugs, vacuum pump and refrigerant cylinder.
- Make sure the unit is OFF.
- Remove the cap of the suction and discharge service valve by using an adjustable wrench.
- Before connecting the gauge manifold in the charging lines, check if the manifold valve is close and make sure the pressure reading is zero.
- Connect the blue color hose at the suction charging line and the red color hose to the liquid discharge line.
- Close the liquid line service valve and the service valve going to the evaporator.
- Slowly close the discharge service valve and throttle the suction service valve of compressor motor to equalize the pressure on the system.
- After pressure equalization, fully close the suction service valve.
- Loosen the bolt and nut of the filter drier core shell.
- Removed the filter drier core then clean the housing using clean rugs.
- Install the new filter drier core, don’t forget to replace the gasket of the shell cover.
- Tighten the bolts and nuts.
- Vacuum the system.
- Slowly open all service valve, suction and discharge service valve by rotating counterclockwise.
- Switch ON the Chiller unit.
- Charge additional refrigerant until you reach the ideal pressure which normally ranges from 60 – 69 psi for suction pressure and 250 – 270 psi for discharge pressure.
- Observe the pressure reading at least 5 minutes.
- Check the differential pressure across the filter drier core.
- After gathering data, return the cap of service valve and charging line.
Chemical Dozing on Chilled Water Line (Annually)
- Prior to work, wear safety shoes, gloves and goggles.
- Prepare treatment chemicals, screw driver and adjustable wrench.
- Chemical feed tank should be available in the chilled water line, otherwise provide alternative way on how to charge the chemical.
- Amount of chemical to be doze shall be as per recommendation by the Chemical Supplier who conducted analysis on the chilled water sample.
- Close the inlet and outlet valves of the chilled water line connected to the chemical feed tank.
- Drain excessive water on the chemical feed tank to accommodate the volume of the chemicals to be added.
- Slowly open the chemical inlet valve of the feed tank.
- Pour required amount of chemicals on the chemical feed tank.
- Close the inlet valve of the feed tank.
- Open the inlet and outlet valves of the chilled water line connected to the chemical feed tank.
- Chilled water and dozed chemical should now mix inside the chilled water line.
- Get water sample again after a week and give the sample to the chemical testing laboratory or caretaker supplier.
- All parameters should be within the specified requirement. Keep record of the reports for reference purposes.
- Chilled water line treatment shall be carried out once every year to maintain the good condition of the whole Chilled water system.
ANNUAL PREVENTIVE MAINTENANCE OF CHILLER UNIT
Prior to work, wear safety shoes, gloves and goggles. Prepare rugs, powdered soap, water, jet pump, multi-meter, oil filter, filter drier core, refrigerant oil, oil pump, coil cleaning chemical, paints, canvas cloth and refrigerant cylinder.
Compressor Checking
Change oil and oil filter. Drain the oil by removing the nut located below the compressor oil sump.
Remove the oil filter and change with a new one.
Charge new refrigerant oil using oil pump.
- Clean the crankcase sump with dampened cloth.
- Check the operation of the crankcase heater; replace if found defective.
- Check unloading mechanism where applicable.

- Check suction and discharge pressure reading. Suction pressure should be 60 – 69 psi while discharge pressure should be 250 – 270 psi. Charge additional refrigerant if needed.
- Check oil pressure using gauge manifold.
- Overhaul and replace any defective parts if necessary.
- Check anti-vibration mounting; replace if found any defects.
- Check seals for any refrigerant leaks; replace if found any.
- Check for undue noise and vibration. Rectify if found any.
- Open the terminal box of the compressor motor. Clean and check for loose terminals and presence of burns.
- Check insulation test resistance of the compressor motor winding by using multi-meter. Get line to line and line to ground resistance reading.
- Clean compressor body using dampened cloth with soap.
Evaporator or Cooler Checking
Check for insulation damage. Change if found any. Cooler should be covered with two coats of weather proof paints.
Check for any water leaks on the cooler shell joints and connections.
Condenser Fan and Motor Checking
Clean condenser coil by using approved chemical and by jet pump.
Dismantle condenser fan blades. Check for cracks and defects; replace if found any. Clean and paint all condenser fan blades.
Check insulation resistance of motor winding by using a multi-meter. Get line to line and line to ground resistance reading.
Control and Safety Devices Checking
Check solenoid valves. Repair or replace if fond defective.
Check High Pressure Cut-out Switch. It should operate according to its function. Repair or replace if found defective.
Inspect and check operation of Low Pressure Cut-out Switch. It should operate according to its function. Repair or replace if found defective.
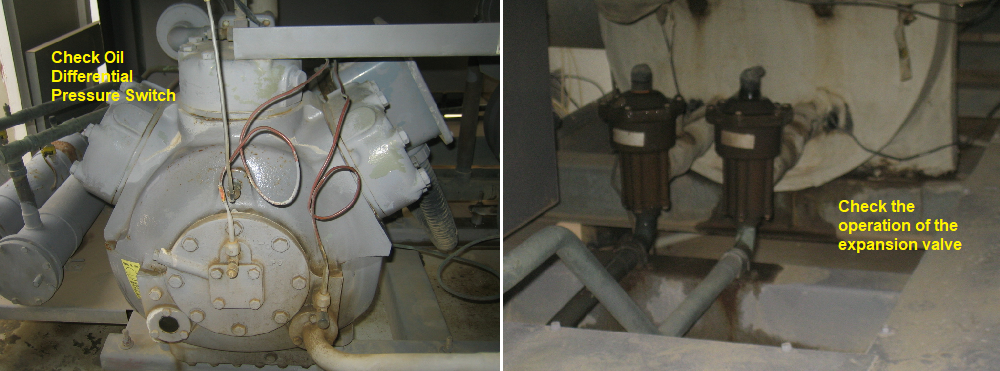
Check Oil Differential Pressure Switch. Repair or replace if found defective.
Verify the operation of anti-freezing cut-out. Repair or replace if found defective.
Check the operation of the expansion valve. Repair or replace if found defective.
Check hot-gas by-pass valve where applicable.
Missing control device to be provided.
Chiller Control Panel and Side Panel Inspection & Checking
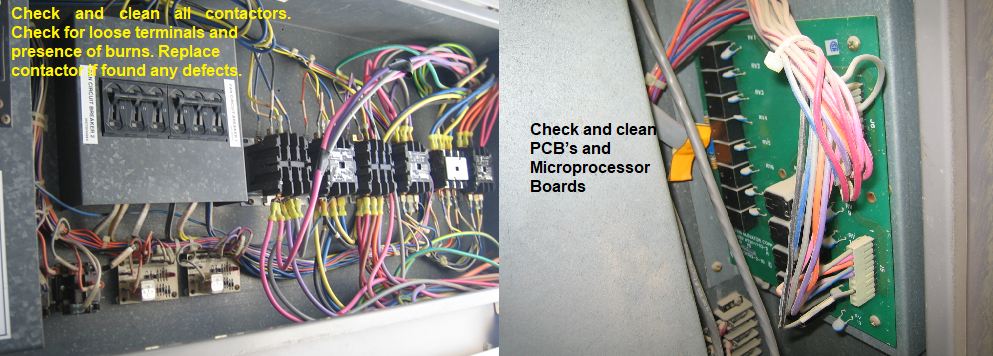
Check and clean all contactors. Check for loose terminals and presence of burns.
Replace contactor if found any defects. Check and clean PCB’s and Microprocessor Boards.
Check for presence of burns on the PCB’s and repair if found any.
- Check timer relay and delay timer if applicable.
- Check overloads, transformers and fuses. Replace if found defective.
- Check and tighten all terminals. Use contact cleaner (CRC) if available.
- Clean inside and outside surface of the control panel.
- Check operation of isolators for proper function. Clean inside and outside of the isolator unit.
Chiller Body Inspection and Routine Checking
Check chiller isolating mounting. Repair or replace if found defective.
Scrape and paint rusted portion of the Chiller unit.
Chilled Water Pipe Inspection Procedure
Check for any pipe leaks. Repair if found any.
Check for any rusted portion of the pipe. Replace if found any.
Scrape and paint rusted portion of the piping.
Check for any damage insulation. Replace if found any.
Apply two coats of weather proof paint to the chilled water pipe.
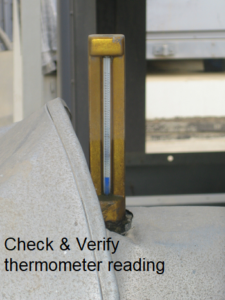
Check and verify thermometer reading. Replace if found defective.
Check pressure gauge reading. Replace if found defective.
Check condition of all valves. Apply grease and paint.
Check chilled water flexible connections. Repair or replace if found any defects.
Automatic valves to be cleaned. Repair or replace if found defective.
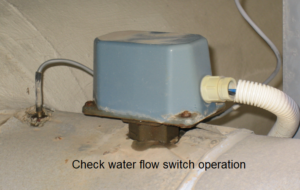
Check water flow switch operation. Repair or replace if found defective.
Replace all missing and damage hangers and brackets. Paint rusted portion of the pipe line supports.
General Chiller Maintenance Tips
- Conduct draining, flushing, refilling and dozing of treatment chemicals for chilled water system.
- Fill-up necessary maintenance checklists for reference.
- Checklist may vary for every project and equipment depending on the scope of work as per contract agreement.
Attachment – Chiller Maintenance Checklist for Chiller Unit